Do you want to get SMS text message when a user submits a WordPress form on your website?
Receiving text messages on your phone makes it easy to stay on top of new form submissions, leads, product orders, registrations, and more.
In this article, we’ll show you how to easily get SMS text messages from your WordPress forms.

Why Get SMS Text Messages From Your WordPress Forms?
Getting SMS text messages from your WordPress forms lets you receive instant alerts on your phone. This can be very useful for small business websites with smaller teams.
For instance, if you run a restaurant website, then may get want to get an instant alert for food order form on your website.
Similarly, if you have an appointments or bookings form on your website, then an instant text message can notify you of a new booking.
Note: This tutorial is about receiving text message alerts yourself or for your team. If you want to send text messages to your readers and customers, then check out our guide on how to send SMS messages to your WordPress users.
For this tutorial, we will use WPForms which is the best WordPress form builder plugin on the market. We’ll use Twilio which is a leading text messaging service to send SMS texts.
Since our goal is to always show no-code solutions for beginners, we will be using Zapier to act as a bridge between the two apps.
This will let you setup everything without having any coding knowledge.
Ready? Let’s get started.
Setting Up Your WordPress Form Using WPForms
First, you need to install and activate the WPForms plugin. For more details, see our step by step guide on how to install a WordPress plugin.
While WPForms has a free version, you’ll need at least their PRO plan to access the Zapier addon which we need for this tutorial.
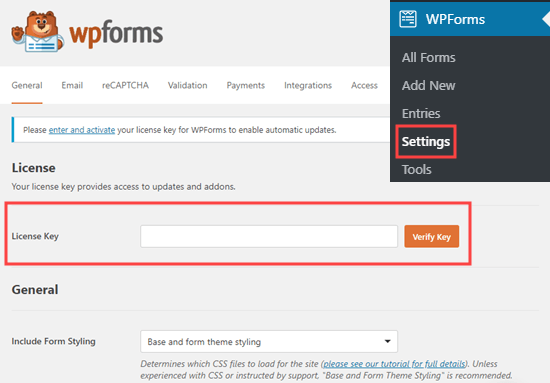
Upon activation, you need to enter your WPForms license key. You will find this under your account area on the WPForms website.
Simply go to the WPForms » Settings » General page in your WordPress admin to add your license key:
Next, it’s time to create your first form.
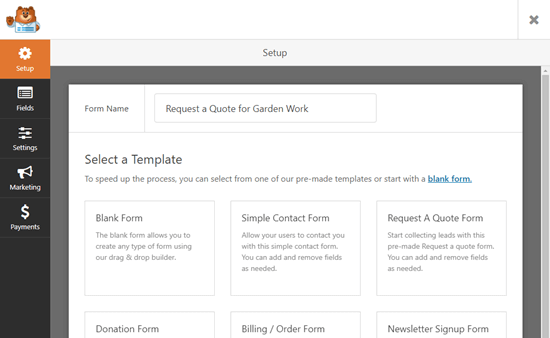
Simply go to WPForms » Add New page to launch the WPForms’ form builder. You need to give your form a name and choose a template:
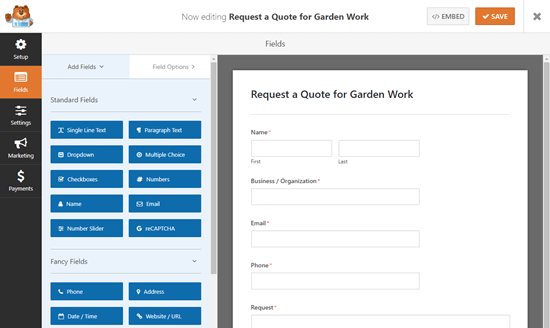
Go ahead and use the drag and drop editor to modify your form however you want. Don’t forget to click the Save button after making changes.
Once you’re happy with your form, it’s time to add it to your site. You can edit an existing post or page or add a new one.
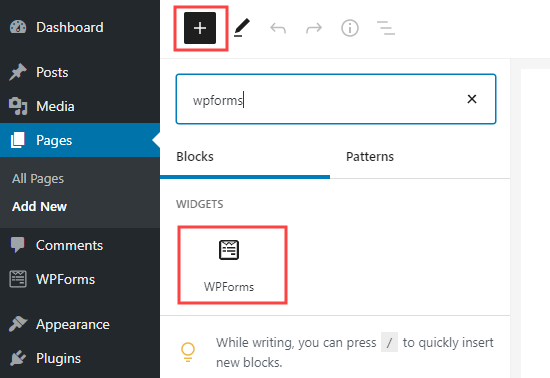
We’re going to add a new page by going to Pages » Add New in the WordPress admin.
If you’re using the WordPress block editor, then click the add new block (+) button and then insert the WPForms block to the content area.
Once you’ve added the WPForms block, you need to choose the form you created earlier from a dropdown list.
You can now save your post or page and preview your form.
You need to submit a test entry in order to set up Zapier. Here’s our test entry in our custom form:

Need more help creating your form or adding it to your site? Follow our step by step instructions on how to create a contact form in WordPress for more details.
Preparing to Connect WPForms and Zapier
We are going to use Zapier to connect WPForms and Twilio. To do this, you need to install and activate the WPForms Zapier addon.
Simply go to the WPForms » Addons page. From here you need to search for the Zapier addon and then click the ‘Install Addon’ button.

The Zapier addon will be installed and activated for you.
Now, you need to visit the WPForms » Settings » Integrations page. Just click on the Zapier logo and you will then see your Zapier API key.
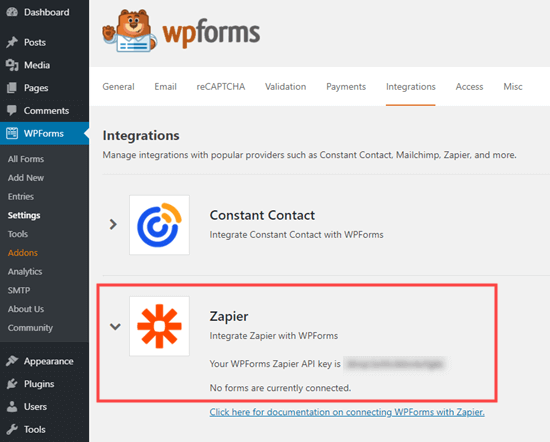
You will need the API key in a later step to connect Zapier to your WPForms. Go ahead and copy it somewhere safe, or just leave the tab open.
Preparing to Connect Twilio and Zapier
We’re going to use the Twilio service to send an SMS message. It is the leading SMS service, and they offer a limited free account that you can use.
First, you need to visit the Twilio website and click the Sign Up button at the top to create your account.

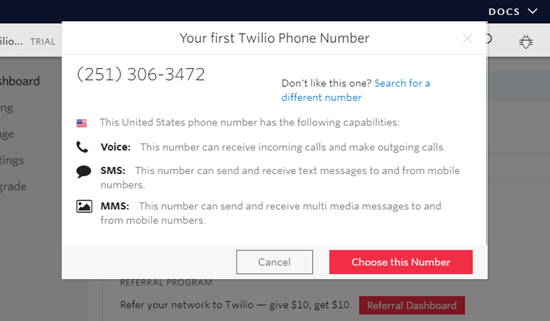
Once you’ve set up an account, you need to choose a phone number. This is the number that will be sending you texts.
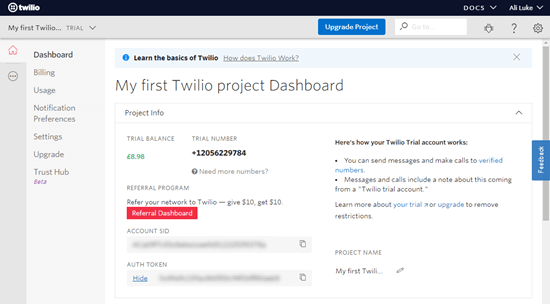
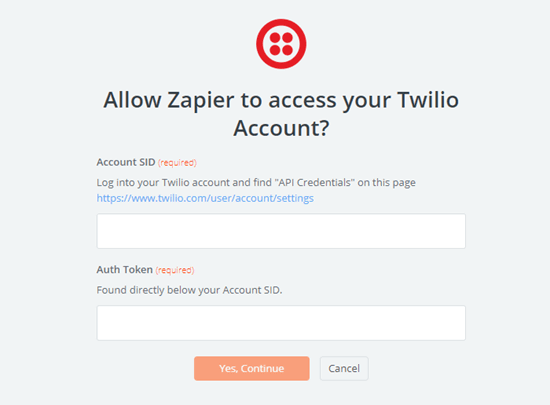
You will also see your Twilio Account SID and Auth Token. You will need these when you set up Zapier. You could copy them to a safe place, or leave your tab open.
Creating a Zap to Send an SMS When Your Form is Submitted
To use Zapier, you need to sign in on the Zapier website. If you don’t have an account, simply create a free one.
Next, click the ‘Make a Zap’ button in your Zapier dashboard:

Note: Zapier uses the word ‘Zap’ for a process with a trigger and an action. Our trigger will be someone submitting the form. Our action will be to send an SMS message.
Go ahead and give your Zap a name at the top of the screen. Then, you need to set up the trigger.
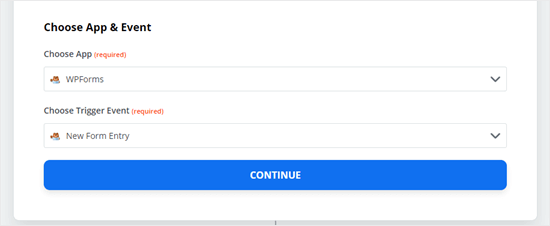
First, you need to type ‘WPForms’ into the search bar. The WPForms icon should come up. Simply click on it.
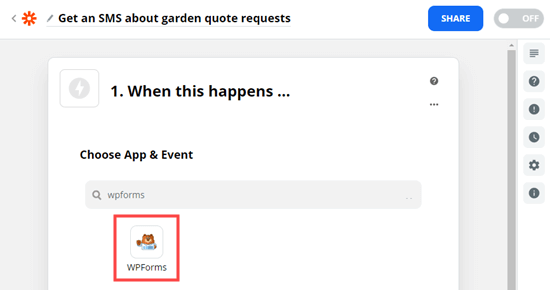
Zapier will automatically fill in ‘New Form Entry’ for the trigger event. You just need to click the ‘Continue’ button here:
Now, Zapier will prompt you to sign into WPForms. Go ahead and click the ‘Sign into WPForms’ button:

You should then see a popup window. Here, you need to enter the API key that you found earlier. You also need to add the URL (domain name) of your website.
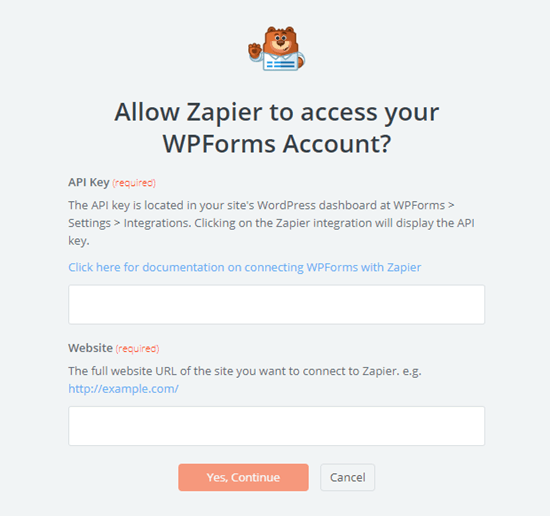
After you’ve done that, just click on the ‘Yes, Continue’ button to move on.
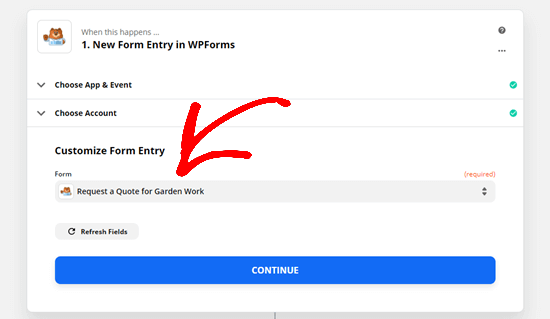
Now, you need to select your form from a dropdown list.
Next, Zapier will prompt you to test your trigger. This will use the test data that you submitted through your form. Go ahead and click the ‘Test trigger’ button:
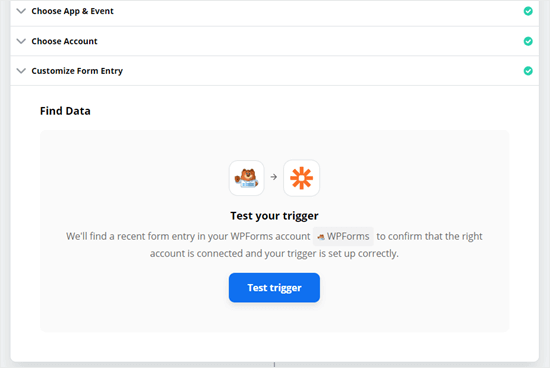
You will then see your test data:
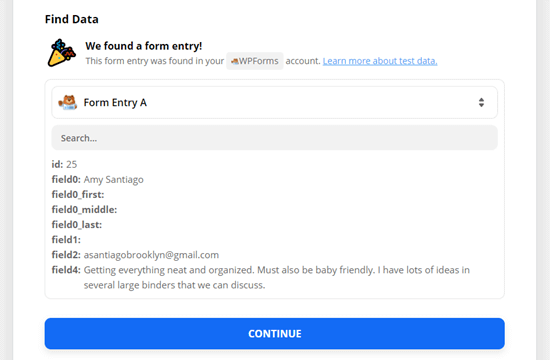
Just click the Continue button to move on. Zapier will now take you to the action part of your Zap.
Here, you need to type in Twilio. Then, go ahead and click the Twilio icon:
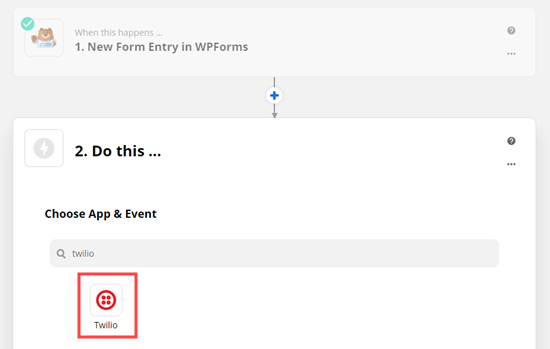
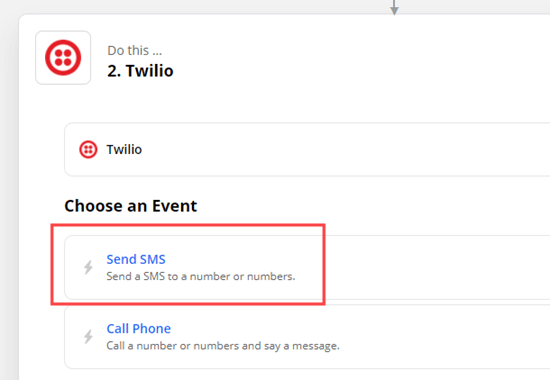
You now need to choose the action event. Simply click on the ‘Send SMS’ option here:
Next, Zapier will prompt you to sign into your Twilio account. You need to enter the Account SID and Auth Token that you found earlier.
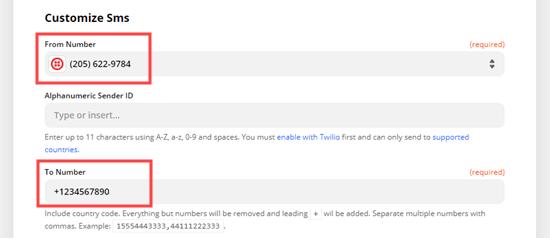
You now need to customize your SMS message.
Just click on the From Number dropdown and you should see the free phone number from your Twilio account. Simply select this.
For the To Number, type in your own phone number.
For the message, you can type in any text you like. You can also select from your WPForms input fields.
With our message, we’re including the name, email address, and request from the form:
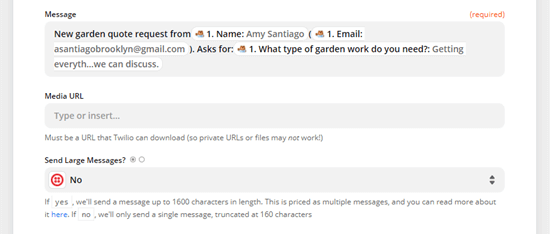
You can also choose to send the message as a large message. This is useful if you want to include lots of detail in the SMS. However, it will use up your Twilio free credit faster.
When you’re ready to move on, just click the Continue button.
Zapier will now show you the data that will be sent through your Zap. Just click the Test & Continue button to send the test:
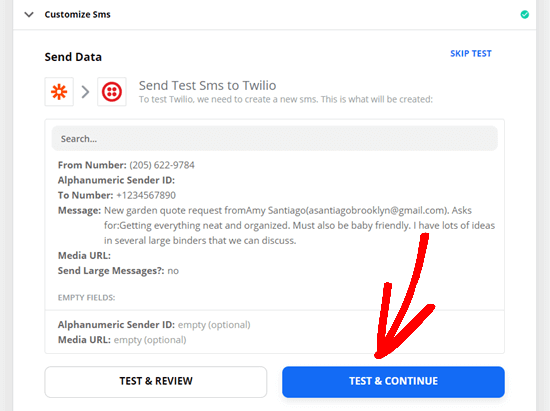
You should see a message saying that the SMS was successfully sent:

We also recommend checking your phone to make sure you received the SMS:
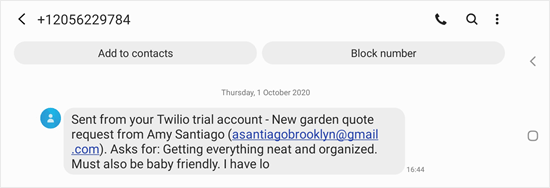
Hopefully, the SMS message reached you successfully. Just click the ‘Turn On Zap’ button and your Zap will be switched on.

Now, you will get a text each time someone completes your WordPress form.
We hope this article helped you learn how to get SMS text messages from your WordPress forms. You may also want to see our comparison of the best business phone services, and our guide on how to create a free business email address.
If you liked this article, then please subscribe to our YouTube Channel for WordPress video tutorials. You can also find us on Twitter and Facebook.
The post How to Get SMS Text Messages From Your WordPress Forms appeared first on WPBeginner.
Source: WPBeginner
