Do you want to learn how to easily fix leverage browser caching warning in WordPress?
By fixing the leverage browser caching warning, you’ll quickly speed up your WordPress site and deliver a better experience to your website visitors.
In this article, we’ll show you how to easily fix leverage browser caching warning in WordPress.

What is Browser Caching in WordPress?
Browser caching is a way to improve your website loading speeds. When a web page loads, all of the files will be loaded separately.
This creates multiple requests between the browser and your WordPress hosting server, which increases the web page loading time.
When browser caching is enabled, your web browser stores a copy of your web page locally. This allows browsers to load common files like stylesheets, logo, images, etc faster when the user visits a second page on your site.

This reduces the overall server load because fewer requests will be made to the actual server, and your website performance will improve as a result.
Where will You See the Leverage Browser Caching Warning for WordPress?
The leverage browser caching warning means that you don’t have browser caching enabled, or your caching could be set up the wrong way.
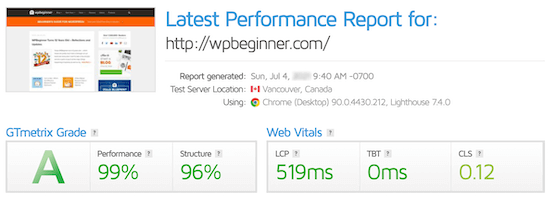
When you’re running a website speed test, you’ll get a report that shows you what you can fix to speed up WordPress.
If your website isn’t currently using browser caching, then you’ll get a warning to enable browser caching.
This is how it can look when looking at your results from a page speed insights tool.

Sometimes you’ll get a warning that says your efficient cache policy isn’t working.
Both of these warning refers to an error with your browser caching set up.

Leveraging browser caching means activating and customizing the caching rules to speed up your site.
That being said, let’s take a look at how to easily fix leverage browser caching warning in WordPress using two different methods.
Simply use the quick links below to choose how you want to fix the leverage browser caching warning in WordPress.
Method 1. Fix Leverage Browser Caching Warning with WP Rocket WordPress Plugin
WP Rocket is the best WordPress caching plugin in the market. It’s very beginner friendly and can help you optimize your site for speed, even without knowing complex caching and speed terms.

Right out of the box, all of the recommended caching settings will really speed up your WordPress website.
To fix the leverage browser caching warning with WP Rocket, all you have to do is install and activate the plugin.
That’s it.
For more details, see our guide on how to properly install and setup WP Rocket in WordPress.
WP Rocket will automatically enable browser caching and modify your .htaccess file with the right rules.
Note: if you’re using SiteGround web hosting, then you can use the free SiteGround Optimizer plugin instead.
It has nearly the same features as WP Rocket, and it will automatically enable browser caching for you.
Method 2. Fix Leverage Browser Caching Warning by Adding Code to WordPress
The second method involves adding code to your WordPress files. If you haven’t done this before, then see our beginner’s guide to pasting snippets from the web into WordPress.
This method is not as beginner friendly, so please only follow this if you know exactly what you’re doing. For most business owners, we recommend using Method 1.
With that said, let’s take a look at how to fix leverage browser caching warning by adding code to WordPress.
Note: before you customize your WordPress code, we recommend backing up your WordPress site. For more details, see our guide on how to backup and restore your WordPress site.
Determine if Your Website is Running Apache or Nginx?
First, you need to figure out if your website is using Apache or Nginx servers.
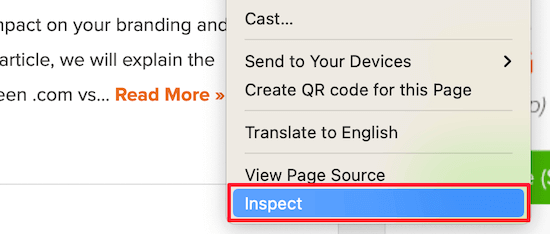
To do this, open up your website in a new tab or window. Then, right click and select the ‘Inspect’ option.

Next, click the ‘Network’ tab at the top of the page.
You may need to refresh the page for the results to load.

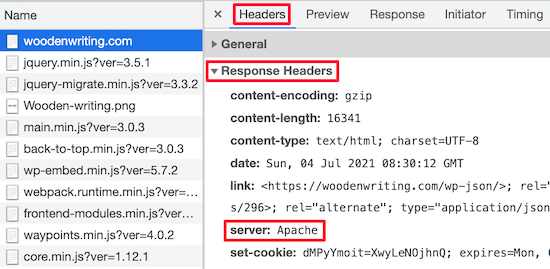
After that, click your domain name in the ‘Name’ column.
It should be at the top of the page.

Then, in the ‘Response Headers’ section, you’ll see an item called ‘server’ where the type of server is displayed. In this case, the site is running on an Apache server.

Add Cache-Control and Expire Headers in Apache
To fix the leverage browser caching warning with an Apache server, you’re going to be adding code to your .htaccess file.
To edit this file, you need to connect to your WordPress hosting account with an FTP client or your host’s file manager tool.
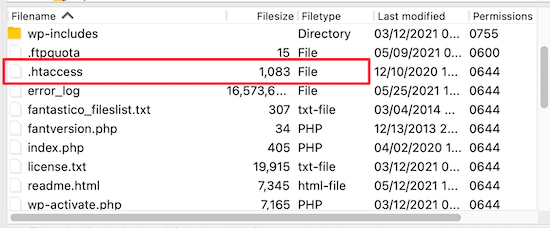
After you’re connected, you can see your .htaccess file in your website’s root folder.

If you can’t find it, then don’t worry. Sometimes this file can be hidden. For more details, see our guide on why you can’t find .htaccess file on your WordPress site.
Next, you need to add cache-control and/or expire headers to turn on browser caching. This tells the web browser how long it should store your website resources before they are deleted.
The cache-control header gives specific details to the web browser about how caching should be done.
The expires header enables caching and tells the web browser how long it should store specific files before being deleted.
You can add the following code to your .htaccess file to add expire headers:
## EXPIRES HEADER CACHING ##
<IfModule mod_expires.c>
ExpiresActive On
ExpiresByType image/jpg "access 1 year"
ExpiresByType image/jpeg "access 1 year"
ExpiresByType image/gif "access 1 year"
ExpiresByType image/png "access 1 year"
ExpiresByType image/svg "access 1 year"
ExpiresByType text/css "access 1 month"
ExpiresByType application/pdf "access 1 month"
ExpiresByType application/javascript "access 1 month"
ExpiresByType application/x-javascript "access 1 month"
ExpiresByType application/x-shockwave-flash "access 1 month"
ExpiresByType image/x-icon "access 1 year"
ExpiresDefault "access 3 days"
</IfModule>
## EXPIRES HEADER CACHING ##
This code set different cache expiration dates based on the type of file.
After that, you can add the following code to enable cache-control:
<filesMatch ".(ico|pdf|flv|jpg|jpeg|png|gif|svg|js|css|swf)$">
    Header set Cache-Control "max-age=96000, public"
</filesMatch>
This code sets the time for when the cache will expire. In the example above, the cache will expire in 90,000 seconds.
After that, the web browser will request new versions of the files.
Add Cache-Control and Expire Headers in Nginx
If you’re using an Nginx web server to host your WordPress blog, then you can edit the server configuration file to fix the browser caching error.
How you edit and access this file depends on your host, so you can reach out to your hosting provider if you need help accessing the file.
Then, you need to add the following code to add expire headers:
  location ~* .(jpg|jpeg|gif|png|svg)$ {
    expires 365d;
  }

  location ~* .(pdf|css|html|js|swf)$ {
    expires 3d;
  }
This code will set the expiration times for the different file types. Notice that images are cached longer than HTML, CSS, JS, and other file types since images usually stay the same.
After that, you can add the following code to add cache-control headers:
location ~* .(js|css|png|jpg|jpeg|gif|svg|ico)$ {
 expires 14d;
 add_header Cache-Control "public, no-transform";
}
This code sets the time for when the cache will expire. It tells your server that the file types above won’t change for 14 days.
If you’re looking to speed up WordPress even more, then make sure to check out our guide on how to boost WordPress speed and performance.
We hope this article helped you learn how to easily fix leverage browser caching warning in WordPress. You may also want to see our ultimate list of the most common WordPress errors and how to fix them, and our expert picks of the best SEO tools and plugins to get more traffic.
If you liked this article, then please subscribe to our YouTube Channel for WordPress video tutorials. You can also find us on Twitter and Facebook.
Source: WPBeginner
