

Learn how to fade an image into any background color with Photoshop! Perfect for blending images into designs or adding space for text! A step-by-step tutorial.
Written by Steve Patterson.
In this tutorial, I show you how easy it is to fade an image into any background color with Photoshop. This is a great way to blend an image into a larger design, or for creating space to add text beside your subject.
We’ll start by creating a new document and placing an image into it. Then we’ll choose an initial color for the background, and fade the image into the color using a layer mask. Finally, I’ll show you how to change the background to any color you like, including how to choose a color directly from the image itself.
You can follow along with any recent version of Photoshop. But note that one of the steps uses a gradient, and Adobe made changes to the gradients back in Photoshop 2020. So for best results with this tutorial, you’ll want to be using Photoshop 2020 or later. I’m using Photoshop 2021.
Here’s an example of what the final result will look like:
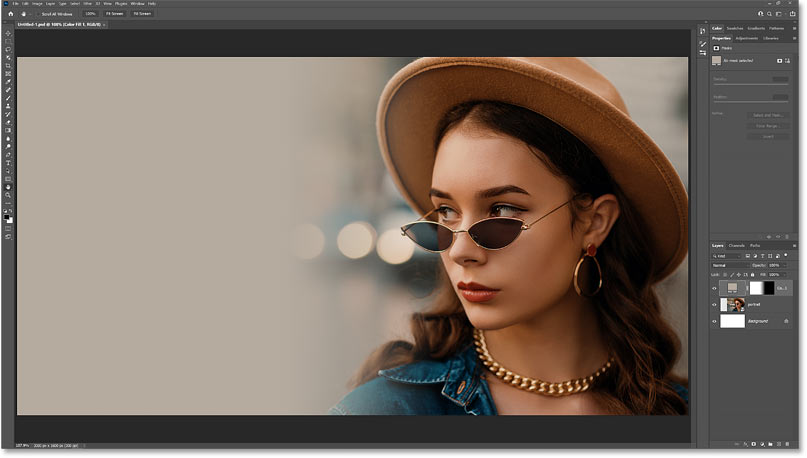
An image faded into a background color.
Let’s get started!
Step 1: Create a new Photoshop document
Start by creating a new document. If you’re on Photoshop’s Home Screen, create a new document by clicking the Create new button

Clicking Create new
on the Home Screen.
Or if you’re on the main interface, go up to the File menu and choose New:
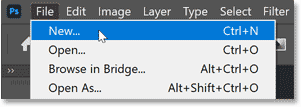
Going to File > New.
Then in the New Document dialog box, enter your settings. I’ll set the Width to 3000 pixels, the Height to 1600 pixels, the Resolution to 300 pixels per inch and the Background Contents to White:
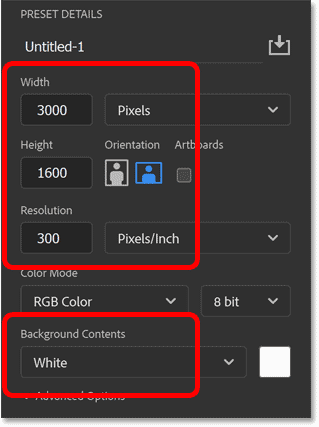
The new document settings.
Then create the new document by clicking the Create button:

Clicking the Create button.
Step 2: Place your image into the document
Next, place your image into the document by going up to the File menu and choosing Place Embedded:

Going to File > Place Embedded.
Navigate to the image on your computer, click on the image to select it, and then click Place:

Choosing the image and clicking Place.
Related: Open image vs Place image in Photoshop
Photoshop places the image into the document, and it opens the Free Transform command so we can resize the image if needed and move it into place. If your image is larger than the document size, Photoshop will automatically resize it to fit, as it did here (fashion portrait from Adobe Stock):
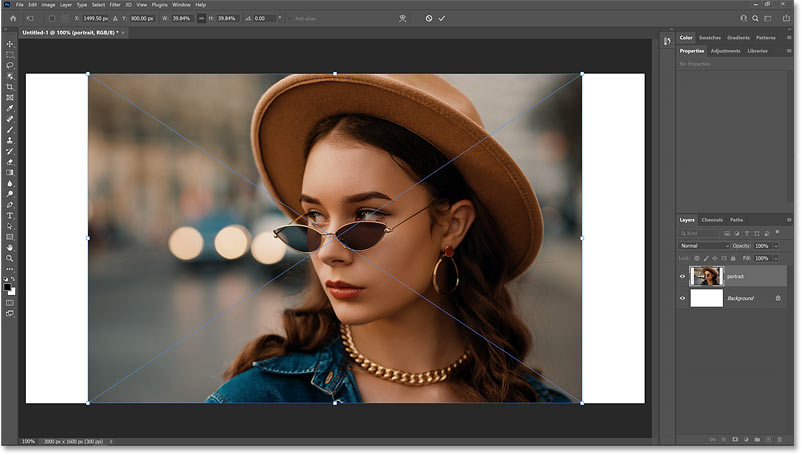
Free Transform opens automatically when placing an image into a document.
Step 3: Drag your subject to one side of the document
To make more room for the image to fade into the background, move your subject over to the side by pressing and holding the Shift key on your keyboard and dragging the image left or right. Holding Shift limits the direction you can move, making it easier to drag straight across:
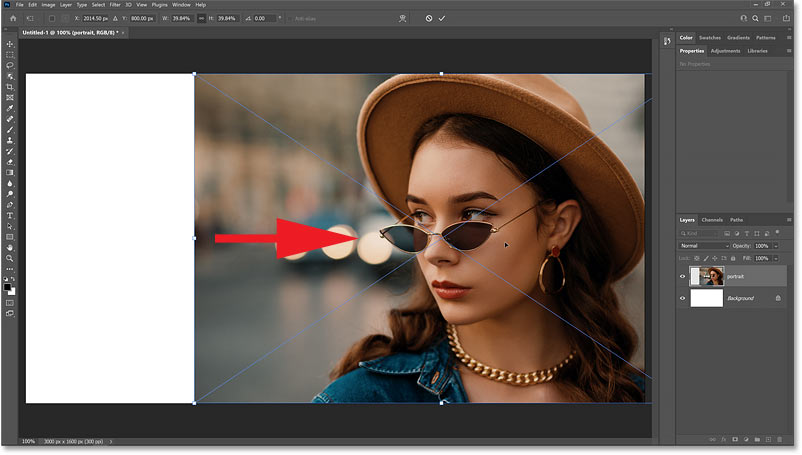
Dragging the subject to one side of the document.
When you’re done, close Free Transform by clicking the check mark in the Options Bar:

Clicking the check mark.
In the Layers panel, we see that Photoshop placed the image on a new layer above the Background layer:
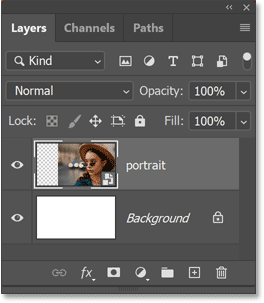
The image was placed on its own layer.
Related: How to open multiple images as layers!
Step 4: Add a Solid Color fill layer
We’re not actually going to use the Background layer for the background color. Instead, we’ll use a Solid Color fill layer which will make it easier to choose any color we need.
To add a Solid Color fill layer, first make sure your image layer is selected. Then click the New Fill or Adjustment Layer icon at the bottom of the Layers panel:
![]()
Clicking the New Fill or Adjustment Layer icon.
And choose Solid Color from the list:
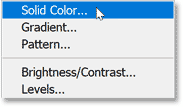
Adding a Solid Color fill layer.
Step 5: Choose an initial background color
In the Color Picker, you can choose any color you like. But I’ll choose white for now by setting the R, G and B values to 255. We’ll come back and change the color once we’ve faded the image into it.
Click OK when you’re done to close the Color Picker:
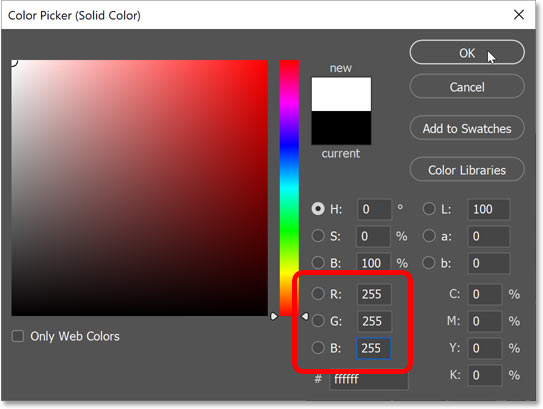
Choosing white as the starting background color.
Back in the Layers panel, the fill layer was added above the image, which is why it’s blocking the image from view:
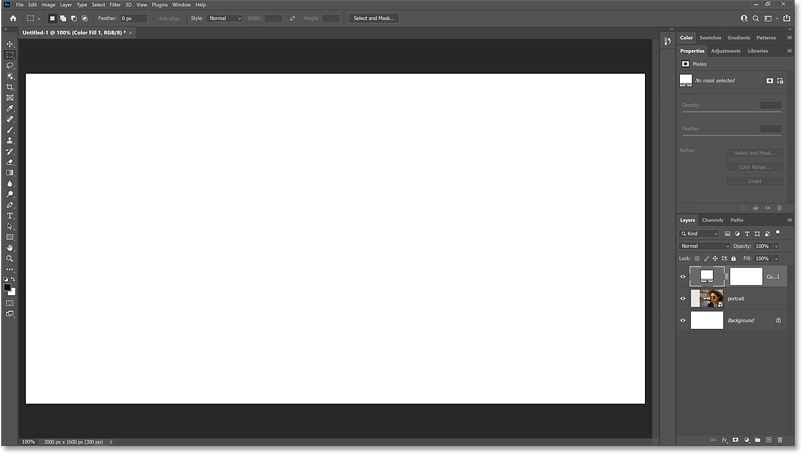
The document is temporarily filled with white.
And notice that the fill layer includes a built-in layer mask. We’ll use this layer mask to fade the color into the image:
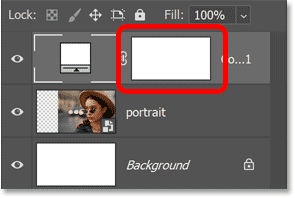
The layer mask thumbnail on the fill layer.
Step 6: Select the layer mask
At the moment, the fill layer itself is selected, which we can tell by the white border around the color swatch. We need the layer mask to be selected, so click on the mask thumbnail:
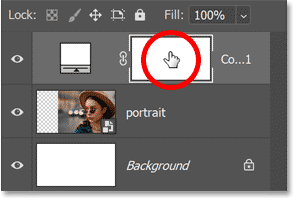
Selecting the layer mask.
Step 7: Select the Gradient Tool
To fade the color and the image together, we’re going to draw a gradient on the mask. And for that, we need the Gradient Tool.
Select the Gradient Tool from the toolbar:

Selecting the Gradient Tool.
Step 8: Choose the Black to White gradient
Then in the Options Bar, click on the arrow next to the gradient swatch:
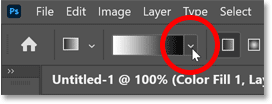
Clicking the arrow to open the Gradient Picker.
In the Gradient Picker, twirl open the Basics folder (new as of Photoshop 2020) and choose the Black to White gradient by double-clicking on its thumbnail:
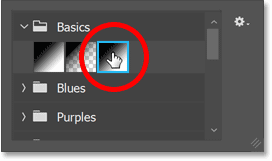
Double-clicking the Black to White gradient thumbnail.
Step 9: Draw a black to white gradient on the layer mask
Now because we can’t see the image yet, we’re not going to get things right on the first try. But the idea is to drag out a black to white gradient across the layer mask in the area where we want the image to fade into the color.
So set a starting point for the gradient by clicking and holding somewhere in the general area of where your subject appears. In my case, she’s on the right:

Clicking and holding with the Gradient Tool to set the start of the gradient.
Then with your mouse button still held down, press and hold the Shift key on your keyboard and drag across the area where you want the image and the color to fade into each other. So this will be the transition area between the color and the image. Holding the Shift key as you drag limits the angle of the gradient so it’s easier to drag straight across:
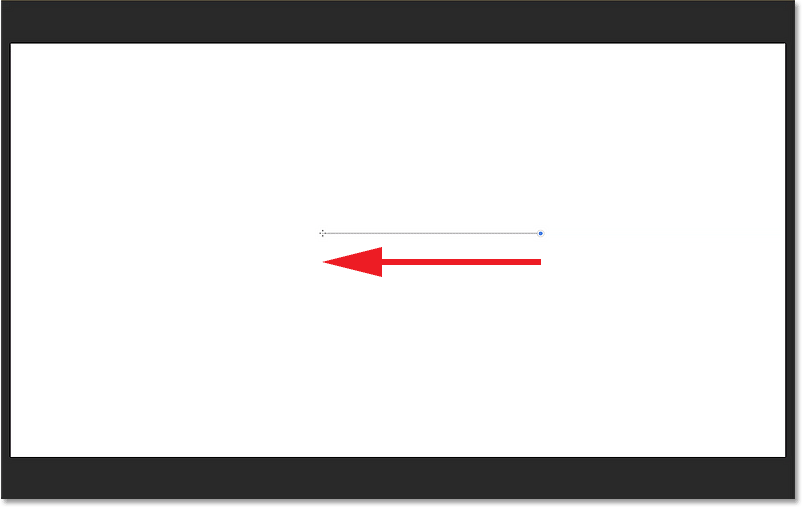
Holding Shift and dragging across the transition area between the image and the color.
Then to complete the gradient, release your mouse button, and then release your Shift key (in that order). And just like that, the image is now fading into the color:
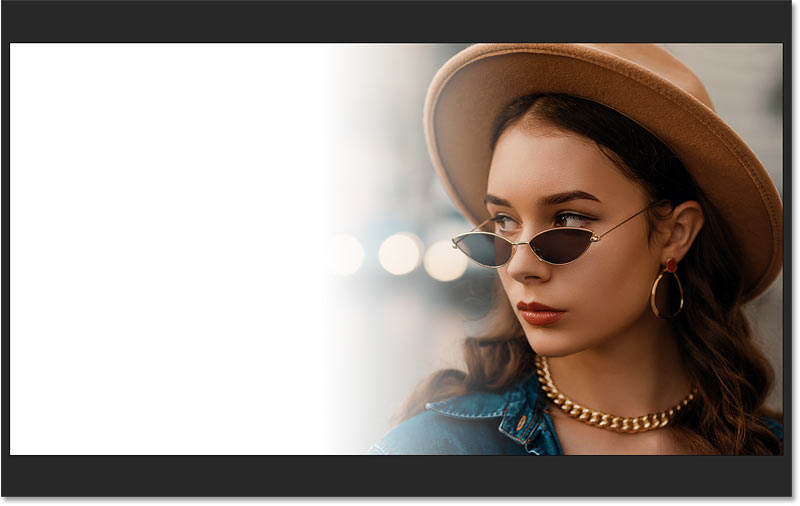
The image now fades into the color.
Viewing the gradient in the layer mask thumbnail
We can see the gradient by looking at the layer mask thumbnail in the Layers panel. The black area of the mask is where the fill layer is 100 percent hidden, allowing the image below it to show through. The white area is where the fill layer is 100 percent visible and blocking the image from view. And the gradient in between is where they fade together:
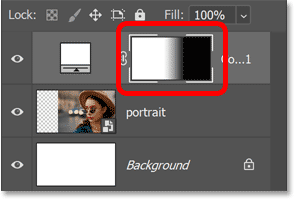
The gradient appears in the layer mask thumbnail.
How to view the gradient in the document
You can also view the layer mask in the document itself by holding the Alt (Win) / Option (Mac) key on a Mac, and clicking on the layer mask thumbnail:
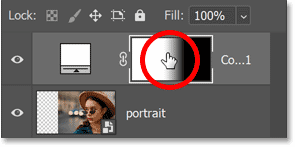
Holding Alt (Win) / Option (Mac) and clicking the layer mask thumbnail.
And now it’s easier to see the black area where the image is showing through, the white where the color is visible, and the transition area between them:
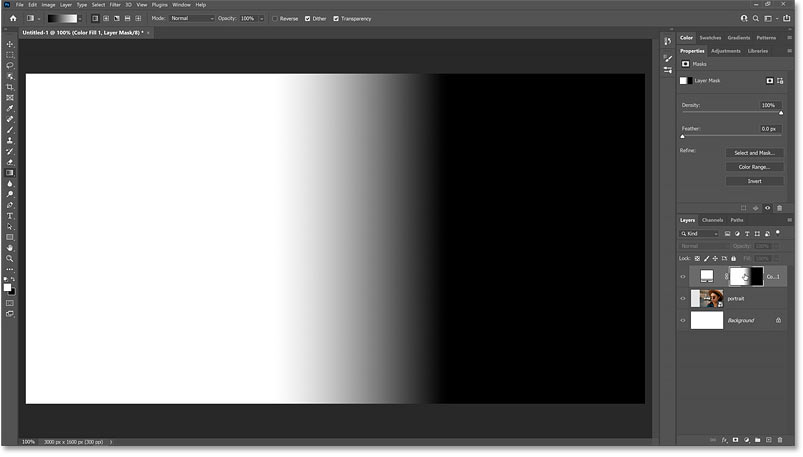
Viewing the layer mask in the document.
Hold the Alt or Option key and click the layer mask thumbnail again to hide the mask:

Holding Alt (Win) / Option (Mac) and clicking again on the layer mask thumbnail.
Step 10: Redraw the gradient to adjust the fade effect
Now if you didn’t draw the gradient in exactly the right spot, that’s okay because you can just draw another one. In fact, you can redraw the gradient as many times as you need. Each new gradient you draw will replace the previous one.
I’ll click to set my starting point somewhere around the woman’s eye:
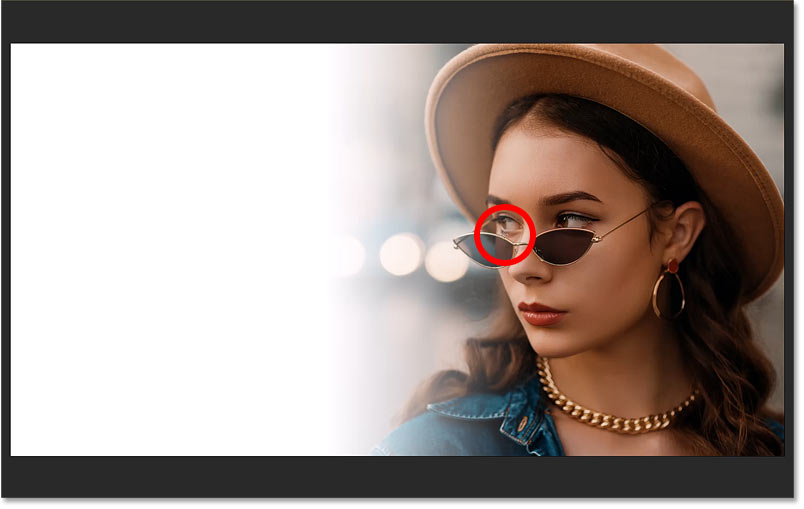
Clicking to set the starting point of the second gradient.
Then with my mouse button still down, I’ll hold the Shift key on my keyboard and I’ll drag over to the left:
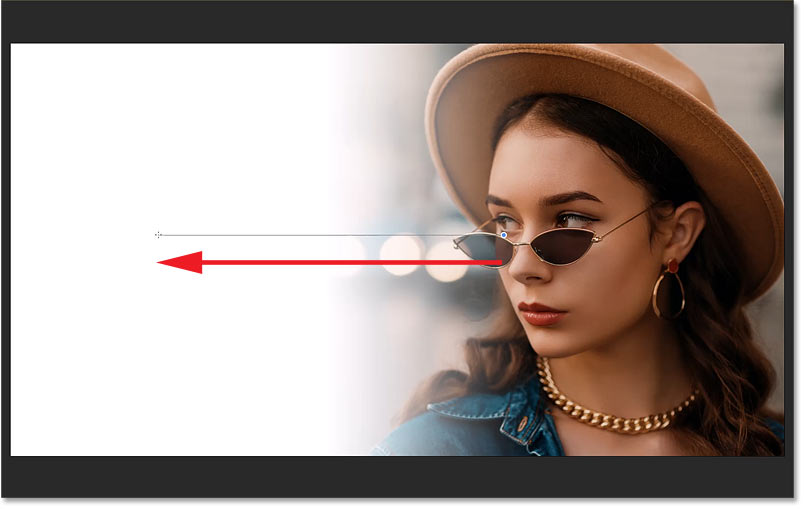
Holding Shift and dragging across the transition area.
But notice when I release my mouse button that I went too far, and we can see the left edge of the image:
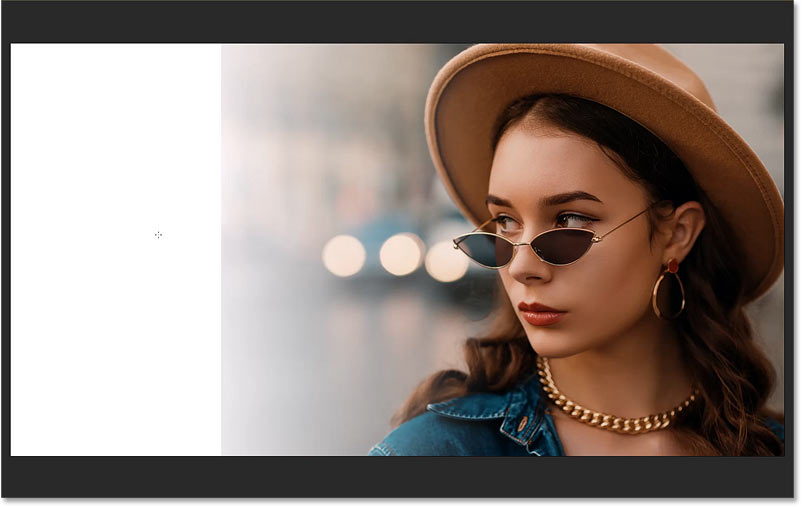
The left edge of the image is visible.
So I’ll try one more time, starting in the same spot:
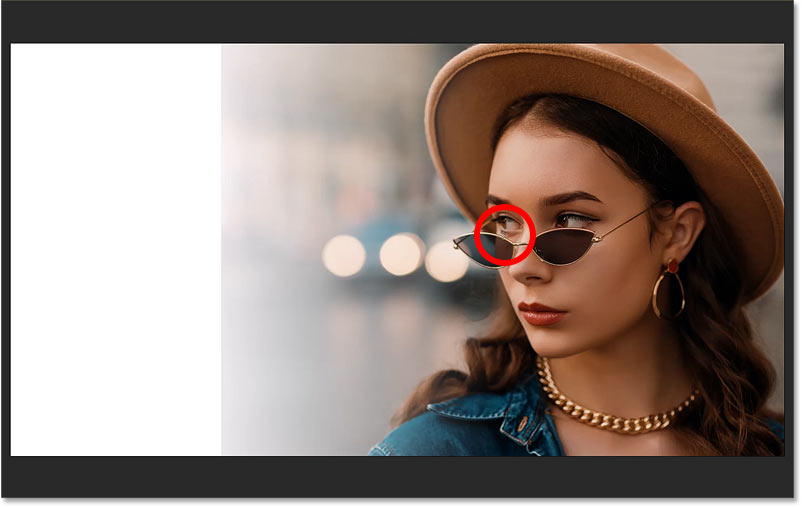
Clicking to set the starting point for the third attempt.
But this time dragging a shorter distance:
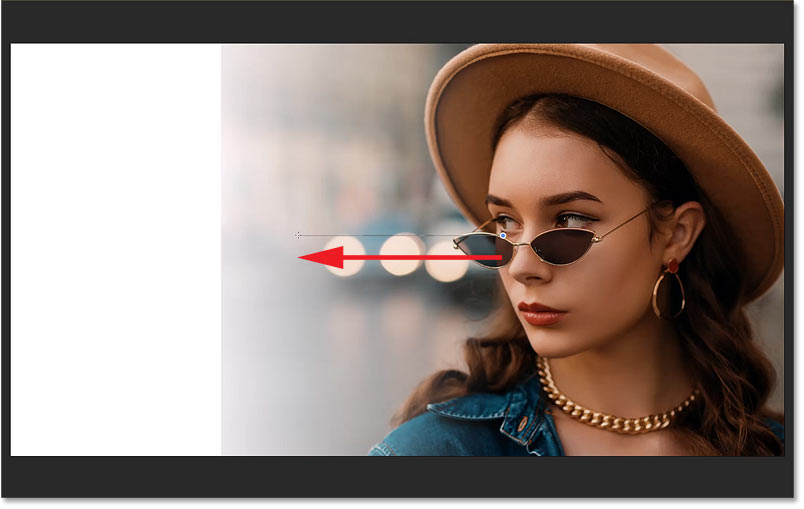
Dragging out a shorter transition area.
I’ll release my mouse button, then the Shift key. And this looks better:
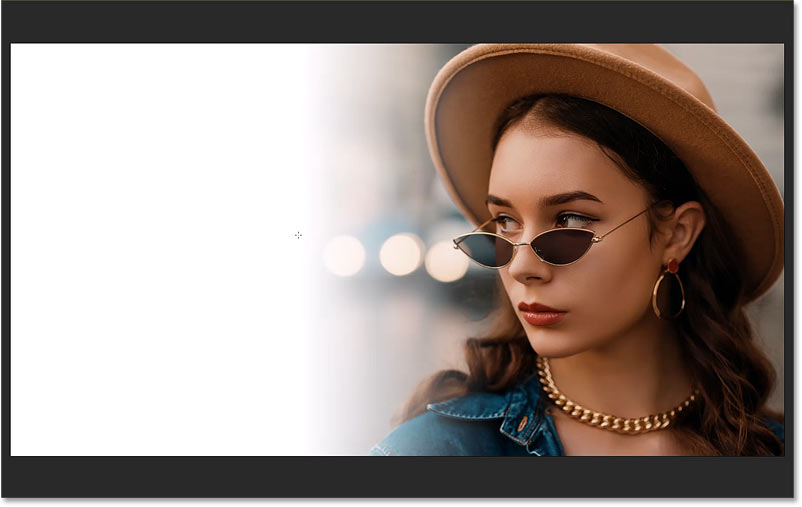
A better result.
Step 11: Choose a new fill layer color
Once you have the image fading into the color, you can change the color by double-clicking on the fill layer’s color swatch in the Layers panel:
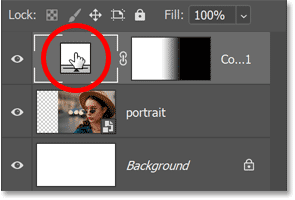
Double-clicking the fill layer’s color swatch.
Then either choose a new color from the Color Picker:
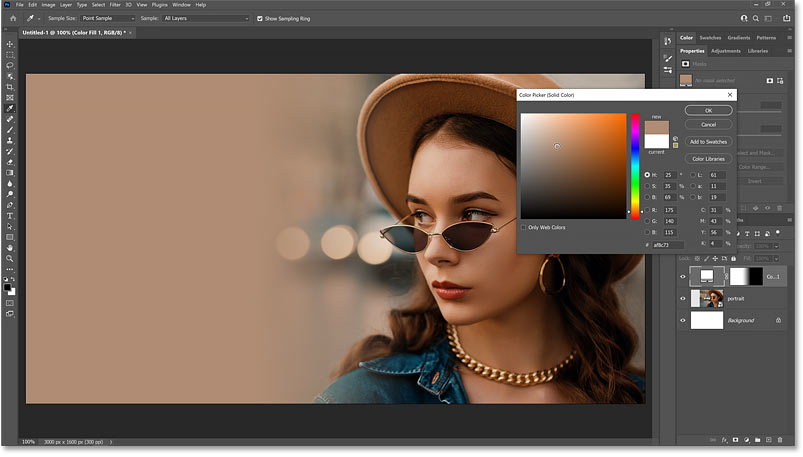
Choosing a different color from the Color Picker.
Or choose one directly from the image. Just move your mouse cursor over the image and click on a color to sample it.
The Sample Size option
But before you sample a color, go up to the Options Bar and change the Sample Size from Point Sample (the default setting) to something larger, like 3×3, 5×5 or 11×11. That way, you’ll sample the average color of the area rather than the color of an individual pixel. I’ll choose 5×5:

Choosing a larger Sample Size.
The Sample option
Also, make sure the Sample option is set to All Layers:

Making sure Sample is set to All Layers.
Then click on different parts of the image to sample the color until you find the one that works best. I’ll sample a grayish color from the upper right. When you’re done, click OK to close the Color Picker:
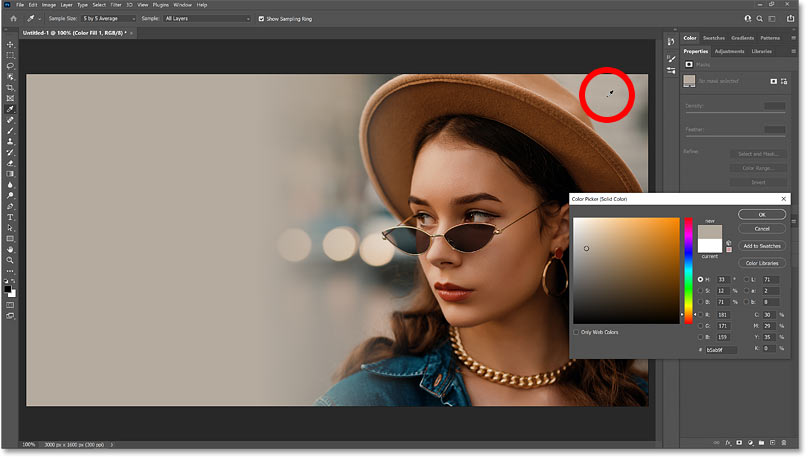
Clicking in the upper right of the image to sample the color.
Step 12: Redraw the gradient (optional)
Finally, if you want to go back and redraw the gradient, just reselect the layer mask thumbnail in the Layers panel:
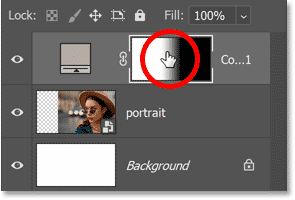
Reselecting the layer mask.
Then with the Gradient Tool still selected, click and hold on the starting point, hold Shift, and drag out the transition area:
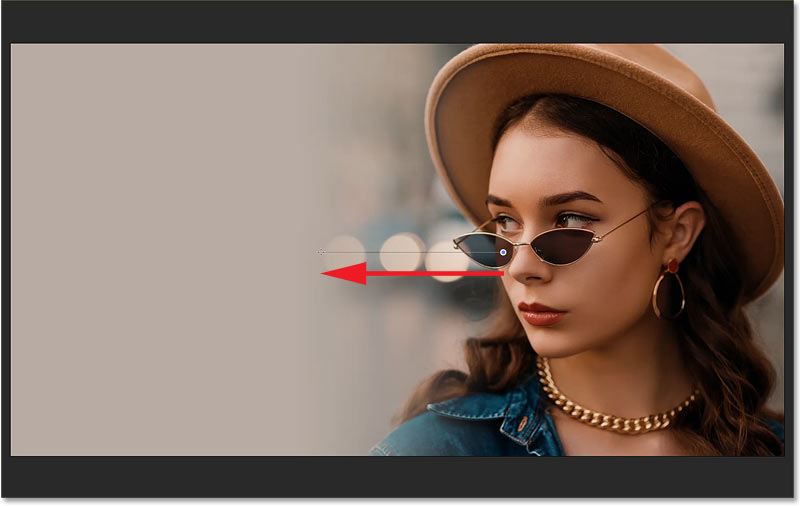
Redrawing the gradient on the layer mask.
Release your mouse button, then release the Shift key. And here is my final result:

The final effect.
Where to go next…
And there we have it! That’s how to fade an image into any background color with Photoshop!
For more ways to blend images together, check out my Three Ways to Blend Two Images tutorial. Or visit my Photo Effects section for more tutorials! And don’t forget, all of my tutorials are available to download as PDFs!
Source: PhotoshopEssentials