Learn how to re-create the look of those classic 3D movies from the 1950’s by adding a retro red and blue 3D effect to your image with Photoshop! A step-by-step tutorial for Photoshop 2021 and earlier.
Written by Steve Patterson.
Long before James Cameron’s Avatar transported us to the breathtakingly beautiful world of Pandora with its state of the art 3D, movie monsters in the 1950’s were leaping out of the screen in terrifying red and blue. And in this tutorial, I show you how to create that same red and blue, retro 3D movie effect with Photoshop!
Of course, since Photoshop works with flat, two-dimensional images, we’re a bit limited in what we can do. Be we can at least make something that looks like it’s straight out of a old 3D movie. And it’s so easy to create that once you know the steps, you’ll be adding this effect to other images in 30 seconds or less!
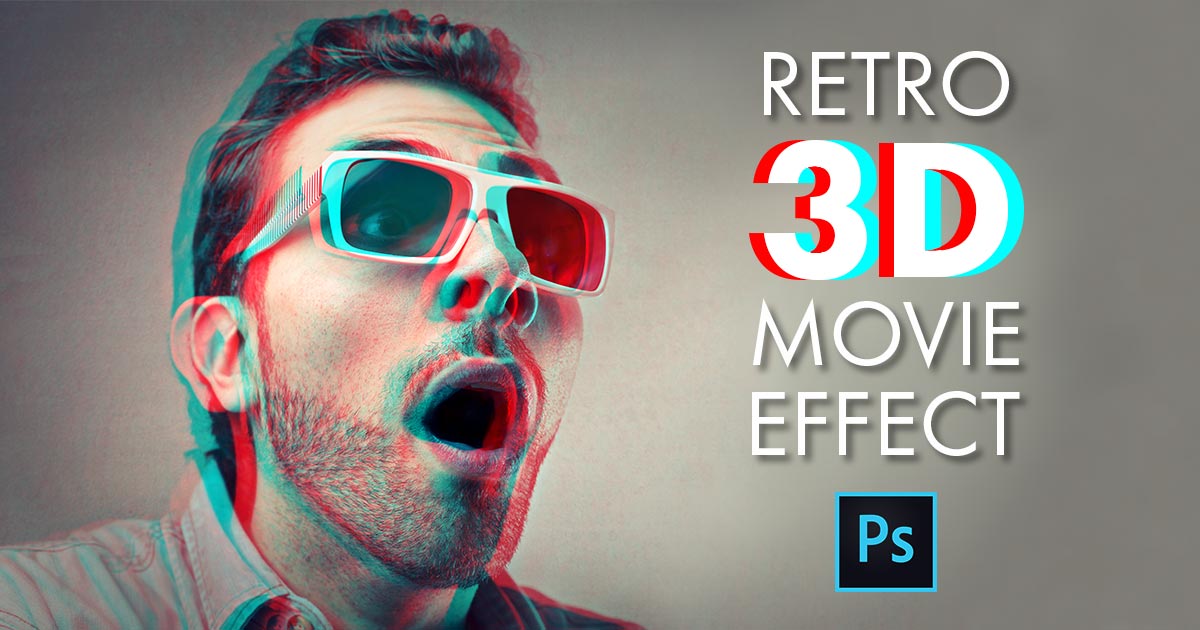
I’m using Photoshop 2021 but any recent version will work. Here’s an example of what the final effect will look like when we’re done:

The final retro 3D effect.
Let’s get started!
The document setup
You can follow along by opening any image into Photoshop. I’ll use this image from Adobe Stock:

The original image. Credit: Adobe Stock.
In the Layers panel, the image appears on the Background layer:

The Layers panel.
Related: Learn all the ways to get your images into Photoshop!
Step 1: Duplicate the Background layer
Start by making a copy of the image. In the Layers panel, click on the Background layer and drag it onto the New Layer icon:

Dragging the Background layer onto the New Layer icon.
A copy appears above the original:

A Background copy
layer appears.
Then double-click on the name Background copy
to highlight it:

Double-clicking on the layer’s name to change it.
And change the layer’s name to 3D
. Press Enter (Win) / Return (Mac) to accept it:

Changing the name to 3D
.
Step 2: Open the Layer Style dialog box
With the 3D
layer active, click the fx icon at the bottom of the Layers panel:
![]()
Clicking the layer effects icon.
And choose Blending Options from the top of the list:

Choosing “Blending Options” from the menu.
Step 3: Turn off the Green and Blue color channels
Photoshop opens the Layer Style dialog box, with the Blending Options in the middle column. In the Advanced Blending section, look for the R, G and B checkboxes next to the word Channels:

The R, G and B channel checkboxes.
R, G and B stand for Red, Green and Blue, which are the three primary colors of light. Each primary color gets its own color channel in Photoshop, and all three channels are mixed together to create every color we see in the image. We’ll use these color channels to create our retro 3D effect.
Uncheck the G and B boxes to turn the Green and Blue channels off, but leave the Red (R) channel turned on. Then click OK to close the Layer Style dialog box:

Turning off the Green and Blue color channels.
To see what’s happened, go back to the Layers panel and hide the Background layer by clicking its visibility icon:
![]()
Clicking the Background layer’s visibility icon.
With only the 3D
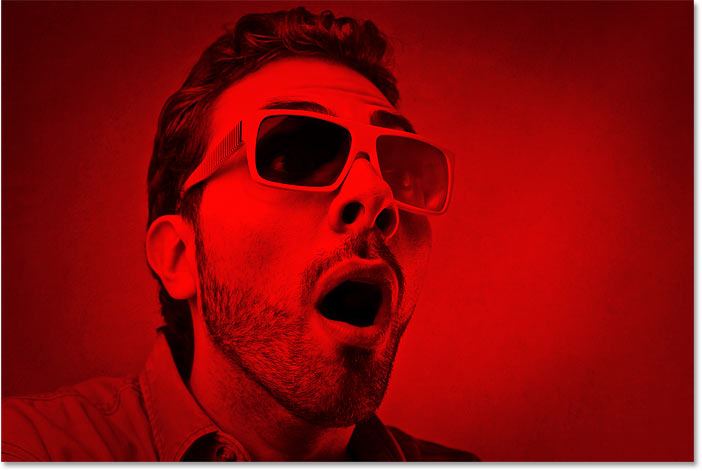
layer visible, and with the Green and Blue channels turned off, the image appears in red:

The image using only the Red color channel.
Turn the Background layer back on by clicking the empty box where the visibility icon normally appears:

Turning on the Background layer.
And now we’re back to the full color image:

The full color image returns.
Step 4: Select the Move Tool
All we need to do now is offset the image on the 3D
layer so that it’s out of alignment with the original image below it.
To do that, first select the Move Tool from the Toolbar:

Selecting the Move Tool.
Step 5: Nudge the image to the left
Then with the 3D
layer selected in the Layers panel, use the left arrow key on your keyboard to nudge the image on the layer towards the left. As the image moves, a red outline appears along one side of each object in the image. And because cyan is the opposite of red, a cyan outline (the other color in those old red and blue
3D glasses) appears along the other side, creating our retro 3D effect.
The further you nudge the image on the 3D
layer, the thicker the red and cyan outlines will appear. So adjust the effect until you’re happy with the result:

Nudging the image on the 3D
layer to create the retro 3D movie effect.
And there we have it! That’s how easy it is to add a fun retro 3D movie effect to an image with Photoshop!
In a separate tutorial, I show you how to create a retro 3D effect with text! Or check out my other photo effects tutorials! And don’t forget, all of my tutorials are available to download as PDFs!
Source: PhotoshopEssentials
